Jalapeño Popper Dip

I made this for New Year’s Eve – going to be on regular rotation now. SO good!

Jalapeño Popper Dip

Jalapeño Popper Dip

Ingredients

16 oz. cream cheese
1 cup mayonnaise
6 jalapeños, chopped and deseeded
1/2 cup grated parmesan cheese
3/4 cup grated cheddar cheese
1/4 cup bread crumbs (or crushed Ritz)

Directions

Let cream cheese soften at room temp. for about 10 minutes. Combine cream cheese, mayo, and jalapeños in a bowl and stir (or beat) until smooth. Add the grated cheeses, reserving 1/4 c. of the cheddar; mix well. Sprinkle bread crumbs over, then sprinkle on the remainder of the cheddar cheese. Put in an oven-safe dish and bake at 350 degrees until golden and bubbly.

Jalapeño Popper Dip

(Mock) White Castle-Like Sliders

In collecting recipes to add to my ever-growing binders of cards, clippings, scraps, and scribbled recipes, I found another new one to try: White Castle-Like Sliders

We don’t have a White Castle anywhere in Madison, much to my dismay. However, it makes it even more of  a treat when we are visiting the Twin Cities and indulge in some of their steamy, oniony burgers. We don’t do this every time we go there because there are so many other places to sample deliciousness from. But when the craving drives us – we’ve indulged (and sometimes felt less than healthy following the indulgence). I have seen frozen White Castle burgers for sale at the grocery store, but I’m not big on frozen fast foods and have not tried them.

The recipe looked interesting, and regardless of the authenticity of the flavor, I figured it the family would be down with eating them.

I purchased my beef at Walmart, and went for the fattier 80/20 that the recipe calls for. I actually followed a recipe. Fancy that! The buns, however, were a little more tricky. I found some mini buns that were called “dollar rolls” – but they cost $3 per bag of 8. No thanks. I found some ciabatta buns for about the same price and there were 12 in there. Because I was doubling the recipe (which makes 24), I figured I’d need 2 packs and could quarter the rolls. It was a decent bet, but then I noticed some mini sub-like rolls, a 24-pack, for the same price. The decision was easy. Actually, I probably put too much thinking into it, as I do EVERYTHING, but when I shop it isn’t always about the product or finding the right one, it’s also about the money. The sub rolls were the most cost-effective.

Armed with all the ingredients, I headed home to take on the recipe.

It is a very. Easy. Recipe. Really, it is. The original site has lots of pictures and step-by-step instructions, so I won’t go into that. I’ll just share how my experience went.

I used a baking sheets rather than a baking dish. In fact, I used two. One large one and one half sheet. They worked fine, fitting side-by-side in my oven. I sprinkled the cup of flakes down on the sheets, then patted the beef on top. I had 5lbs. of beef (a little more than the recipe called for, but I’m SO glad I went ahead with that extra pound – more on that in a bit). Because the onions spread around when you pat the beef on top, I tried to “sprinkle” the beef around the sheet, then pat it all in like play dough. It was the worst part. Ground beef doesn’t exactly sprinkle. I made do, and patted, patched and coerced the beef until it covered the entire bottom of both pans. After that, they went in the oven.

Shock and horror when I pulled them out and notice the teensy, tiny rectangle of beef floating around in the pool of fat (removed in picture below). Besides gently patting the beef with a paper towel like the recipe said, I had to first drain off the over 2 cups of liquified fat, then soak up the rest with towel. It was truly disgusting. A little tricky, too, because I didn’t want to lose my precious rectangle of beef. I started to have serious doubts that I would pull out 48 burgers from the little beef sheet.

Patience.

Cheese time. I had white cheddar. In my head I could hear the kids groaning about my substitution. They prefer yellow (even though it is just dyed cheddar). I topped the meat with the cheese, popped them back in (it takes very little time to melt, FYI) and then stared at the huge bag of rolls that I had not begun to cut. Following the cheese-topping was a crazed kitchen dance of me slicing pickle spears (I skipped out on buying sliced pickles – spears sliced in mini triangles are fine) and quartering the sub rolls that were not cut to being with — all with hope of serving White Castle(ish) burgers that were still warm.

It was exciting and nerve wracking at the same time. I did not get many pictures, due to the frantic pace at which I worked.

I wouldn’t say they were a “hit” – or maybe they were a hit, just not out-of-the-park hit. They were definitely interesting and something out of the ordinary. Rarely can you duplicate a restaurant food, but just make a similar version of. That’s what these were. If you did not know what the attempt was, you might say, “Wow – these are kind of like White Castle” – but you certainly would not mistake them for the original. That said, they are close enough that if you have had WC you would smile at the homemade version, noticing the similarities. Wait. I kind of just said that. Whatever. I think in reality, these were too fresh, and the bread too meaty (I would go with a different bread). Today when I warmed one (OK three) in the microwave for lunch, my mouth was thinking they were closer to the original. A couple days old, and bread spongy-steamed from the microwave, they were closer to tasting like real deal WC junky fast food. I mean that as a compliment, but there’s no way to extract that from it, is there?

Oh – and, interestingly enough – I got 47 burgers out of them. I’d forgotten how small those little patties really needed to be. Not much bigger than a regular pickle slice.

At any rate, these were a fun try. I could definitely see making them for a group – although I’d rather not be doing the latter phase of production with anyone but family around to witness it. I’d make ahead. I also think I’d be a rebel and use less fatty beef next time, too.


Stranger Danger

I am the stranger, but I’m not too dangerous. Armed with a keyboard and a cup of coffee, I’m just beginning to awaken my morning-fogged brain. Pretty harmless. Pretty inconsistent, too, posting once in a blue moon. I never thought I would be so busy, so distracted, that I would forget some of my online interests. Like blogging. But, time allows us so much and Facebook has completely ruined me with my ADD and its constant motion. However, since the change a few days ago, it has alienated me a bit for now, and I’ll stick to the streets for a bit.

Summer has closed, the kids are back to school. I have a senior, a freshmen and two 7th-graders. I continue to work both outside and inside the home. Don’t roll your eyes. I really do work inside the home. By day I manage an office, but by afternoon and night, I manage a home. It consumes me.

As the reality of the public worker cuts set in and the paychecks grow smaller, my work at home takes on an even more fine tuned approach. Frank took a promotion a couple years ago, and for one year we felt like we were climbing up the walls a bit, making some gains on our debt, increasing our financial responsibility. It was good. It felt good. My hours were cut, and my pay went down a bit, but Frank’s made up for it. The extra time I had at home made up for it. Did I say it was good?

We are still ahead of where we would be had he not taken that promotion. His check is now about the same as it was pre-promotion. I can’t imagine what it would be otherwise. We still have good healthcare benefits, thank goodness. But we’re kind of back at square one.

A lot of my time has been spent online couponing. This was the summer of the coupon. I’ve always clipped coupons, and have done well before, but with in combination with the internet, I’ve been able to hunt down deals a little quicker. But it takes. Time. Time. And more time.

I’ve used my homemade deodorant all summer. There have been times where I’ve been concerned that I smell a little more “natural” I would like. On a really hot day, I’d wash my pits midday and reapply. But I haven’t looked back. I haven’t changed. I don’t plan to.

I’ve been washing my face with honey. Although I use a combination of honey and coconut oil. My face is neither dry, nor oily, and my make-up is gone. Try it. Good stuff.

I’ve gained a bit of weight by paying less attention. Summer will do that to me. A re-commitment to health is in order.

And now I’ve posted to my blog. Something I hope to do a little more of, a little more often.

Bread Maker Pizza Crust

#1 Happy Holidailies!

Once again, I’m blogging daily from December 6 to January 5. Live with it. They’re using a slightly different system this year and I hope I can get the hang of it before the end of the Holidailies run, but who is to say. I don’t think I like it already, but maybe it will grow on me.

OK so pizza crusts in the bread maker– or rather, momma hasn’t done much of meal-planning since Thanksgiving and she’s flying by the seat of her pants. That’s probably more appropriate.

Wednesday I made a quick run to Costco while Sal was at goalie practice, and I worked hard not to buy for the sake of buying, but to be thoughtful in what I needed. Of coarse, that means I needed to recall just what it was I needed. Need, need, need. Noodle bowls. Ham. Shredded cheddar cheese… gum, sour cream, Sobe. I didn’t so much need the peeled baby carrots, come to find. But I picked up a HUGE bag anyway (sigh). I’ve been spreadsheeting it out to see what really IS a deal and what IS NOT a deal at Costco. So far it looks like I’m getting decent deals. Just don’t buy the vinegar there. Not a deal.

As I was walking the isles, I decided that I would be making pizzas. The huge bag of shredded mozzarella was calling me to make some pizzas and possibly a casserole. In the cart it went (I did end up making crockpot lasagna and I WILL post the recipe this week).

Back to the pizzas. Now that wrestling season has started (and winter soccer trainings, indoor soccer leagues), life has swung back into crazy gear again. The plus is that Frank coaches and all 3 younger boys are in wrestling at the same time. The not-so-plus is that Dante is just finishing up wrestling (for high-school, they use the same mats as the youth wrestlers), and needs to come home just as Frank is arriving with the boys for their mat time. That means I have to go pick up Dante. Before the youth wrestling started, I’d have dinner ready to go when Dante got home (ravished), and we’d all sit down to eat. Now that we’re on different schedules, it isn’t so easy. It’s only 2 days a week, though, that that happens, so I can’t complain.

Basically what I’m saying is, even though all the boys are occupied, it isn’t a real down-and-dirty “work time” for me because I’m running around in between cooking dinner. Last week on one of those days, I thought I’d be all Ms. Smarty Prepared and start a pizza crust in the breadmaker before I left, come home and start up some pizzas. That would have all been find and dandy had I not set the bread to “Quick Bake” instead of the “Dough” setting.

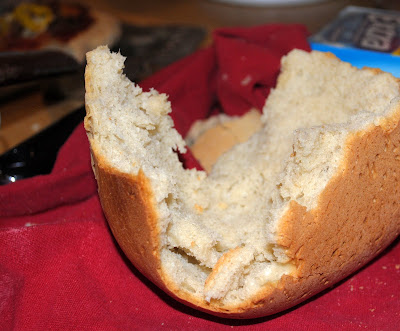
I didn’t actually realize that was the problem, not right away. I thought that maybe there was simply something wrong with my bread maker. I mean, it is a little bit on the older side. But I had made calzone dough in it not too long ago, so I couldn’t figure what went wrong and why my bread maker was so warm. The kids munched on the “bread” and said it was good (they were just hungry). I turned into Maniac Mom, panicking, stressing, hyper-cooking. Refusing to change directions. We were having pizza if it killed me. And it nearly did.

I worked on mixing up a dough that didn’t need to rise or be beaten, thinking that at least they could start on that, and if nothing else worked, their bellies would be satisfied. But, in tandem, I also put another batch of dough in the machine. Well, that’s not true. I intended to put a batch in, while the kids hovered, squawked and asked questions that my brain had to work to answer. Everyone asking me questions and getting in my way makes my head start to sputter and blow smoke. The distractions caused me to add the ingredients to the machine in a fashion that would have rendered yeast-less dough. I had to toss that batch.

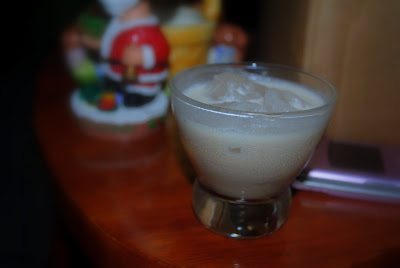
Next attempt went fine, although I realized I screwed up the other no rise/beat dough, adding double the yeast. At this point I was about ready to glug down some spiked eggnog and go lay in a snowbank somewhere. Forget dinner.

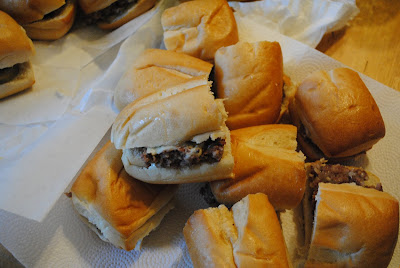
The first pizza to arrive on the table was the no-knead. Pepperoni and banana peppers. No picture.

Second pizza was another no-knead (still waiting on the bread machine to finish its job). Italian sausage and banana peppers.

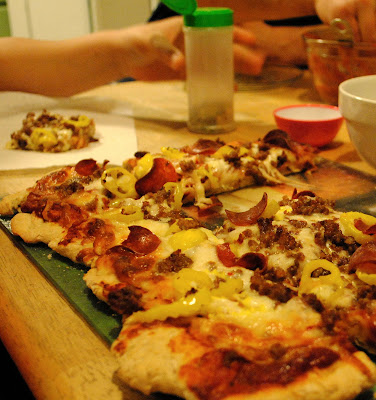
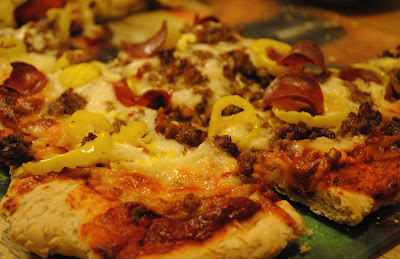
Third pizza was with the “regular” knead-and-rise dough, though I didn’t quite let it rise all the way because we were hungry and I was sick of playing pizza-maker. I used half the dough on 1 pizza and the rest I put in the fridge.

They were all OK, but I prefer the knead-and-rise dough. Frank liked the sausage and pepper one, but got horrid heartburn from it. Sal liked everything. They must have all liked the pizzas enough because what they didn’t eat for dinner, they ate the next day. Every time I make homemade pizzas I wonder why I don’t do it more often. Story of my life.

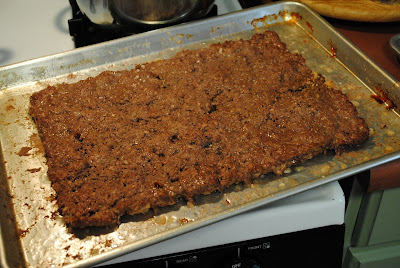
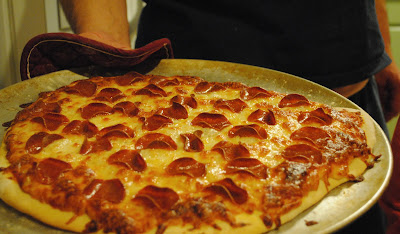
I made a breakfast pizza with the remaining dough. It was also a hit.

Again, Bowzer wondered when he would get his.

Don’t judge us because we don’t take our dog to the groomers. All the boys have long hair at some point.

Homemade Irish Cream

(As posted over in my foodie collection…)

At my last bookclub meeting, one of the ladies brought some “Homemade Bailey’s” (as she called it). I wasn’t sure if I had actually had Bailey’s before, to be honest. I’d had Kahlua, which I thought was similar. I’d always imagined Bailey’s to be minty. I don’t know if it is the whole Irish-green-mint association process that sparks off in my mind or what.

Homemade Irish Cream

At any rate, I tried Kelly’s concoction and it was good. I told myself that I, too, would make some Irish Cream.

Today was the day.

In anticipation for New Year’s Eve tomorrow, I wanted to mix up something a bit festive. Normally I’m one who strays from the recipe card, finding ways to insert my own twist to cast of characters. This time, I was good, and followed the recipe. I figured if I was going to spend close to $30 on a bottle of liquor, I didn’t want to waste it with one of my haphazard “interpretations” of a recipe I had not even tested yet.

I found many variations for Irish Cream, but decided to go with this one from One Perfect Bite:

Irish Cream Liqueur

Ingredients:
1-1/2 cups whiskey (i.e. Jameson’s Irish whiskey)
1 (14-oz.) can sweetened condensed milk
2 cups heavy cream
2 tablespoons chocolate syrup
2 teaspoons instant coffee
1 teaspoon pure vanilla extract
1/2 teaspoon almond extract

I mixed everything in a 4-cup glass measuring container that had a small spout, anticipating the pouring process from the container to my rinsed and empty cherry DaVinci syrup bottle. See, I’m an eager, impatient lady sometimes, when I’m bustling about the kitchen. I had to remind myself to be slow, stir careful and pour patiently. Good girl.

End result? Yummy. It’s a whiskey-tastin’ treat, yes it is. I filled my syrup bottle nearly to the top, and had about 1 cup of leftover. Frank and are sipping the extra right now over ice.

Keeping the Sports Bottles Icy Cold

If you’re like me and you’re short on room, time and the ability to consistently plan ahead, this might be a good tip for you.

I’ve got  a house full of boys in sports, who are always in the need of a jug of cold water to take to practices or games. Depending on the heat outside, they often need MEGA jugs, because  a little bottle of water simply will not do. MEGA jugs are great because they provide enough portable hydration, but they’re not so great because it takes nearly 1/2 bag of store-bought ice to fill it enough to keep it cold for the hours it sits on the sidelines.

Here’s a solution:

Freeze water in similar-sized leftover plastic containers (cottage cheese, yogurt, deli take-out, etc.).

When it comes time to fill the bottle, run the container under a little bit of warm water so the ice block falls right out, plop in your jug and fill. It melts much slower than store-bought ice cubes, and is way more economical. Immediately after using a block of ice, I refill the container and place it in the freezer so it is available for the next practice or game.

My jugs fit a large cottage cheese container perfectly, but depending on the mouth size of your jug, you’ll have to improvise.

Saving Money at the Checkout Lane

It’s been a bit since I’ve posted, I know. I took a little break.

My husband and I had a few days off together, and we spent our time doing non-essentials, as well as essentials that relieved us of some stress (getting some papers handed in, meal-planning, etc.).

Today, after 2 days of slowly gathering my coupons, and some meal-planning, I finally went grocery shopping. My budget was $400, with stops at 2 stores (Sam’s and our local mega-grocer, Woodmans). I spent a little over $100 at Sam’s and $340 at Woodmans (saving close to $19 with coupons). There were a few things I didn’t get, because I know it would have put me over budget and we can live without them until Frank gets paid on Thursday, but for the most part, I got enough to make meals each night, and fillers for lunch and breakfast.

Tonight we had Turkey Maid-Rites. I wasn’t sure how they would go over, but by putting the ingrediants in the crockpot this morning, we were able to have early dinners (for those of us ready to eat early) and then later dinners (for the hungry footballers after practice).

I absolutely love to have my meals “planned” for the most part. Ingrediants on hands, recipes picked out really does help and saves money on quick, thoughtless trips to fast-food, or ordering pizza because there’s no time or brain power to throw together a meal.

Next week the kids go back to school (already), so lunches will be eaten outside of home for the most part. I hope to also be able to start making ahead some meals, too, in addition to planning things out a bit better.

Italian Sausage Soup – AKA “Olive Garden® Zuppa Toscana Soup”

Tonight I made Lootie’s favorite soup: Italian Sausage Soup. He requests it on his birthday, and on other random days. It is a simple, tasty comfort foot that I don’t mind making at all. I can nearly make it in my sleep. Since I was grocery shopping, I picked up the ingredients, except for the broth, since I had that at home, and a crusty loaf of Italian bread – the perfect compliment.

As I cooked the sausage and sliced the potatoes, adding it all the the pot with little bit of salt and red pepper flakes, I had a moment of panic. Is that IT?! Was it really this simple? Am I forgetting something?

I ran into the computer room to search my site for the recipe and found it: Olive Garden® Zuppa Toscana Soup. It was in the archives from 2004. The recipe (a photo) was missing. Tragedy. This is a VERY yummy soup. I must repost it.

This is a homemade version of the Olive Garden® Zuppa Toscana/potato and sausage soup. And honestly, it’s actually better and super-dee-duper easy.

Here’s the exact recipe I have written down, with my subs in parentheses:

Serves 2 [my subs serve 7]

2 3/4 c. Chicken broth [2 large containers of chicken stock]
1/4 c. heavy cream [I don’t use nearly this much — I use 1/4 cup for my increased version and that’s plenty]
1 med. russet potato [3-4 red potatoes]
2 c. chopped kale [no measure, about 5 handfuls, whatever will fit to fill the pot]
1/2# spicy sausage [5 sausages, cooked and cut into medallions]
1/4 tsp. salt [to taste, I don’t measure]

1/4 tsp. red pepper flakes [about 1/2-1tsp. depending on your taste]
1c. shredded Parmesan, if desired

Prepare the sausage by placing in skillet with 1/2 cup water. Cook on medium for 10 minutes, then uncover, turn and cook for 10 more minutes. Cut into medallions. If you use bulk sausage, brown it and break it up into chunks.

1.) Heat stock in large pot over medium heat
2.) Slice unpeeled potatoes; add to soup
3.) Add cooked sausage to soup
4.) Add salt, pepper, cream; stir
5.) Add kale; stir

Simmer for about 1 hour, stirring occasionally. Garnish with some shredded Parmesan and serve with a nice hunk of bread. This soup is wonderful the next day and freezes well.

Mulberry Blueberry Pie

We have a mulberry tree in our backyard. It has been growing now for a few years and bears a decent amount of fruit. The kids love to run out back and pick the berries at random times. The other day Franny was outside long after the others had tired of picking berries, and came in suggesting that I come out and pick berries to make a pie.

There was no bone in my body that felt like whipping up a pie on a warm summer day. But he was so enthusiastic and sweet, it felt completely wrong to give into my own lazy desire to play sloth. I examined the tree, as he washed out a container for our pickings. He was the holder, I was the picker. Slightly taller than Lootie, who had the farthest reach of the three boys that were picking earlier, I was able to get to spots that still had some nice, ripe berries on them.

Not enough for a whole pie, but I had a bag of frozen blueberries in the freezer to supplement, and was pleased to have the opportunity to put them to use in a pie. Frozen blueberries are a common staple at our house, but I’ve yet to have actually made a pie with them. I used this recipe from Crisco for a Bluebbery Pie as a base for the pie we were making. I say “base” because of my inability to stick directly to the recipe when baking. I did my best to stick close to this one, though.

I had about 2 cups mulberries and the rest blueberry.

Franny was in charge of stirring, but he got sidetracked by the guinea pigs. I picked up the scent of bubbly, boiling fruit on the verge of burning, and ran to the rescue. It had started to scorch on the bottom, but thankfully not enough to taint the flavor of the filling.

I used the double crust recipe, but it didn’t seem make enough for the bottom and the top. So I enlisted in my standard oatmeal topping (oats, sugar, molasses, butter, cinnamon, salt and a dash of vanilla).

Initially I started to roll the dough for the crust, but that didn’t last long and soon I was using my preferred method — my fingers to press the dough into the dish.

Franny helps with the filling.

Top me off!!!

Ready for the oven…

Franny holds up our creation.

It was fantastic, and I’m not a big fan of fruit-filled pies. Thank you Franny for suggesting we make pie. I’m so glad we did.

Chocolate Pudding

My mom frequently made pudding for desert when we were kids. She would spoon it into the Buffalo China bowls, or glass dessert dishes. The combination of the dishes and the pudding are imprinted in my memory.

Glass dishes.

Wanting a simple desert I could make from scratch, and also to create the same memory for my own children, I decided to give homemade pudding-making a try. There are all kinds of recipes for chocolate pudding on the internet. Liking to keep things very simple, I chose the chocolate pudding recipe from Hillbilly Housewife. It uses simple ingredients to achieve a delicious desert.

Buffalo China bowl filled with pudding.

The kids absolutely love the pudding. I haven’t used another recipe yet, since this one has been a hit. I double the batch so we can have it for dessert more than once.

The pudding cooks up pretty quickly, and is edible as fast as it cools. One of the interesting aspects of making pudding is that it is reminiscent of soapmaking. The pudding, when ready, resembles the step in soapmaking when the soap comes to a trace. Yum.

Pudding “trace.”